Your garage is the gateway to your home. This is the first room you see when you get back from work and the last one you see when you leave.
Why not make it look and feel a lot better? (And it doesn’t have to cost a fortune.)
Since most garages are nothing more than half-finished boxes for your cars, there are plenty of ways to greatly improve them for less than $50—sometimes even free—without painting or carpentry.
Let’s take a look at seven affordable and easy ways to upgrade your garage.
1. Upgrade to better, brighter lighting – $15.
Often garages have one dim warm light installed in the middle of the ceiling. Often it is between 800 and 1000 lumens and 3000 Kelvin or lower.
In other words: weak.
Such light is suitable for a small interior space with other light sources, but is completely insufficient to illuminate the entire garage.
In addition to lack of practicality, the wrong lighting can negatively affect your mood. Do you really want to come home to a dim light that says, “Oh, you again?”
Or would you rather be greeted by a big, beautiful light that says, “Welcome home!”
Source: Chris Butch.
You can completely light up your garage – and your mood – by installing just a few 1500 lumen, 4000+ light bulbs: one or two in the garage door opener (if it has lighting) and one in the ceiling.
2. Parking guide to hang a tennis ball – $5.
Who needs fancy lasers and judgmental horns to help you park?
If you want to park with absolute precision every time you drive into your garage, all you have to do is install a classic tennis ball parking guide. When your furry green friend bounces softly off the windshield, you’ll know that this is where you need to stop.

Source: Chris Butch.
S&E Garage on YouTube has my favorite method of installing tennis ball park assist. I like his method because it makes it easy to adjust the ball once you attach it to the ceiling.
- Remove your car(s) from the garage.
- Make holes on both sides of the tennis ball.
- Pass the straw through both sides.
- Thread a long piece of string (the same color as your garage wall) through the straw.
- Tie it at the end and remove the straw to make a ball on a string.
- Attach the rope to the ceiling where you think the ball will hit the windshield – about 7 feet from the back wall and 6 feet from the side wall.
- Drive your car into the perfect spot in the garage – one that gives you and your passengers enough space and leaves enough room for you to grab groceries in the back.
- Adjust the ball accordingly by sliding it up the rope and tying another knot, and voila!
Also keep in mind that you don’t need to position the ball over the *center* of the windshield. You can put it right in front of your face on the driver’s side if that’s easier.
3. Install some resin shelving – $50.
I’ve read a lot of DIY guides that recommend DIY wood shelving in the garage. Don’t get me wrong, they look great – and kudos to those who had the patience to build them – but yeah…

Source: Giphy.com
Alternatively, Amazon and Harbor Freight sell resin racks for about $50 each. They require no tools and take about 10 minutes to build.

Doggo for scale | Source: Chris Butch.
I’m a big fan of plastic shelves because they’re cheap, easy to move, and amazingly strong. Each level can hold over 50 pounds of stuff. They also have rounded edges so you won’t trip or trip over them. And one day, when it’s time to move, you can even roll them up and take them with you.
The final advantage of plastic shelves over wood or metal is that if you do If you accidentally bump into them with your car, they have enough flexibility to prevent damage to your car or your garage wall.
4. Use a wooden pallet to store long items – $0 to $15.
Just 4.5″ thick wooden pallets are ideal for storing long items such as rakes and axes. Lean them against a wall, hammer them into a rack and get instant cheap storage!

Source: hometalk
I love wooden pallets as a garage storage solution for many reasons:
- They are practical and only take up a few inches on the floor.
- Raw wood actually looks beautiful, but it can always be stained or stained.
- You can easily “tune” pallet sizes with a saw and/or crowbar.
But the best thing is that they are cheap or free. Look on the Facebook Marketplace, Freecycle or Craigslist and you’re bound to find something.

Source: Facebook Marketplace.
Read more: 7 Secrets to Finding Great Deals on Facebook Marketplace
5 Lubricate Your Garage Door Opener – $7
The garage door opener is noisy as hell. Mine sounds like a refrigerator falling off an escalator.
Luckily, you can calm them down with a $7 can of lithium grease.
You not want to use WD-40 to open your garage door because it’s not a lubricant. WD-40 eliminates squeaks by preventing moisture build-up.
But we need moisture, so the metal-to-metal contacts all over the garage door are much quieter. That’s why we need lube!

Source: Giphy.com
You can buy a can of white lithium grease at any hardware or hardware store. Be sure to get a can with a straw attachment so you can spray directly into those little joints.
For a visual guide, check out this video from HouseImprovements. Shannon is really good at showing exactly where to spray, how much and how to do it safely.
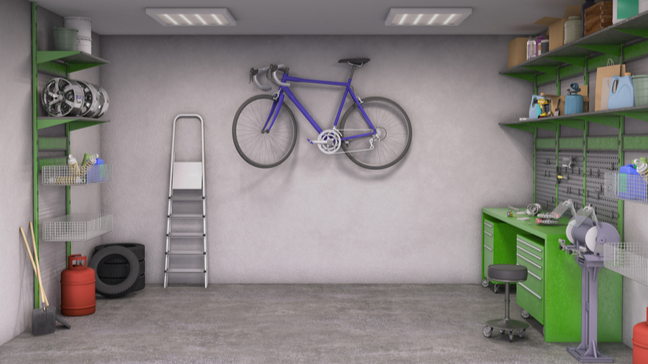
6. Mount bikes vertically – $10
My wife and I love our bikes, but they are awkward to store. No matter where you put them, two adult bikes can easily take up a whopping 25 square feet of space or 30% of a single car garage.
Therefore, it is better to go vertically. If you hang your bikes on $3 hooks, you’ll save over half the floor space.

Source: Chris Butch.
The difficulty lies in twisting them. You’ll need a $20 spike finder and a $50 drill, but trust me as a homeowner, both items will pay for themselves 10x.
Once you find the stud on the wall or ceiling, you will need to drill a hole long enough for the tip of the hook to screw in. As for which bit to use, start small – maybe 3/16″. .
Finally, if you’re not strong enough to lift the bike over your head, screwing the hooks to the wall is also great, leaving one wheel on the ground.
7. Garage floor tiling – $3 per square foot.
Admission: It’s not cheap to upgrade your garage floor.
But this is light.
In addition, it will increase the value of your home and greatly affect how your garage welcomes you.
Now there are three common ways to update your garage floor:
- Polish existing concrete.
- Fill with epoxy.
- Laying tiles on the floor in the garage.
The cheapest option is to make your own epoxy, but it’s tricky, messy, and can lead to sticky floor syndrome.
In contrast, the garage floor tiles simply snap together like LEGOs. No tools, no mess, and you can create cool, custom floors like these:

Source: Big floors

Source: Big floors
Now, it will cost about $600 to fill a one-car garage with tiles, but again, a beautiful garage floor will add value to your home, beautify your garage, and make you feel better every time you get home.
bottom line
Upgrading your garage doesn’t cost much, or in some cases, nothing at all. By following these garage hacks, you’ll have a brighter, cleaner, and overall happier place to enter your home.
And if you want to put all your home improvement expenses on one card for maximum cashback, check out our list of the best credit cards for home improvement projects.
Featured image: vipman/Shutterstock.com